
I used to think gluten-free bread was a lost cause—dry, crumbly, and about as exciting as a cardboard box. Then, one rainy afternoon, I decided to tweak a recipe for my niece, who can’t touch gluten but loves cinnamon raisin bread. After a few flops (and a lot of flour on my counter), I hit gold. This isn’t just bread—it’s a game-changer. Soft, spiced, and packed with raisins, it’s the kind of loaf that makes you wonder why gluten ever got all the hype. I’m spilling the beans on that recipe, plus a wild twist: a cinnamon raisin bread stuffed with a maple walnut swirl. Let’s get baking.
Table of Contents
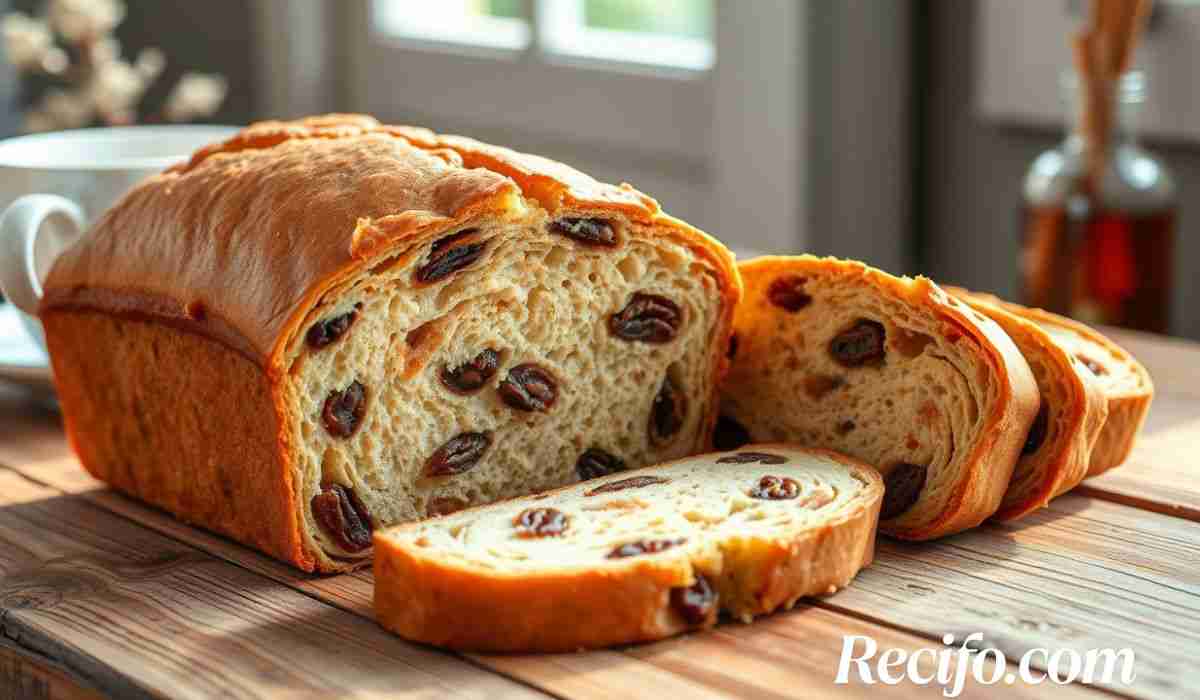
Recipe 1: Classic Gluten Free Cinnamon Raisin Bread
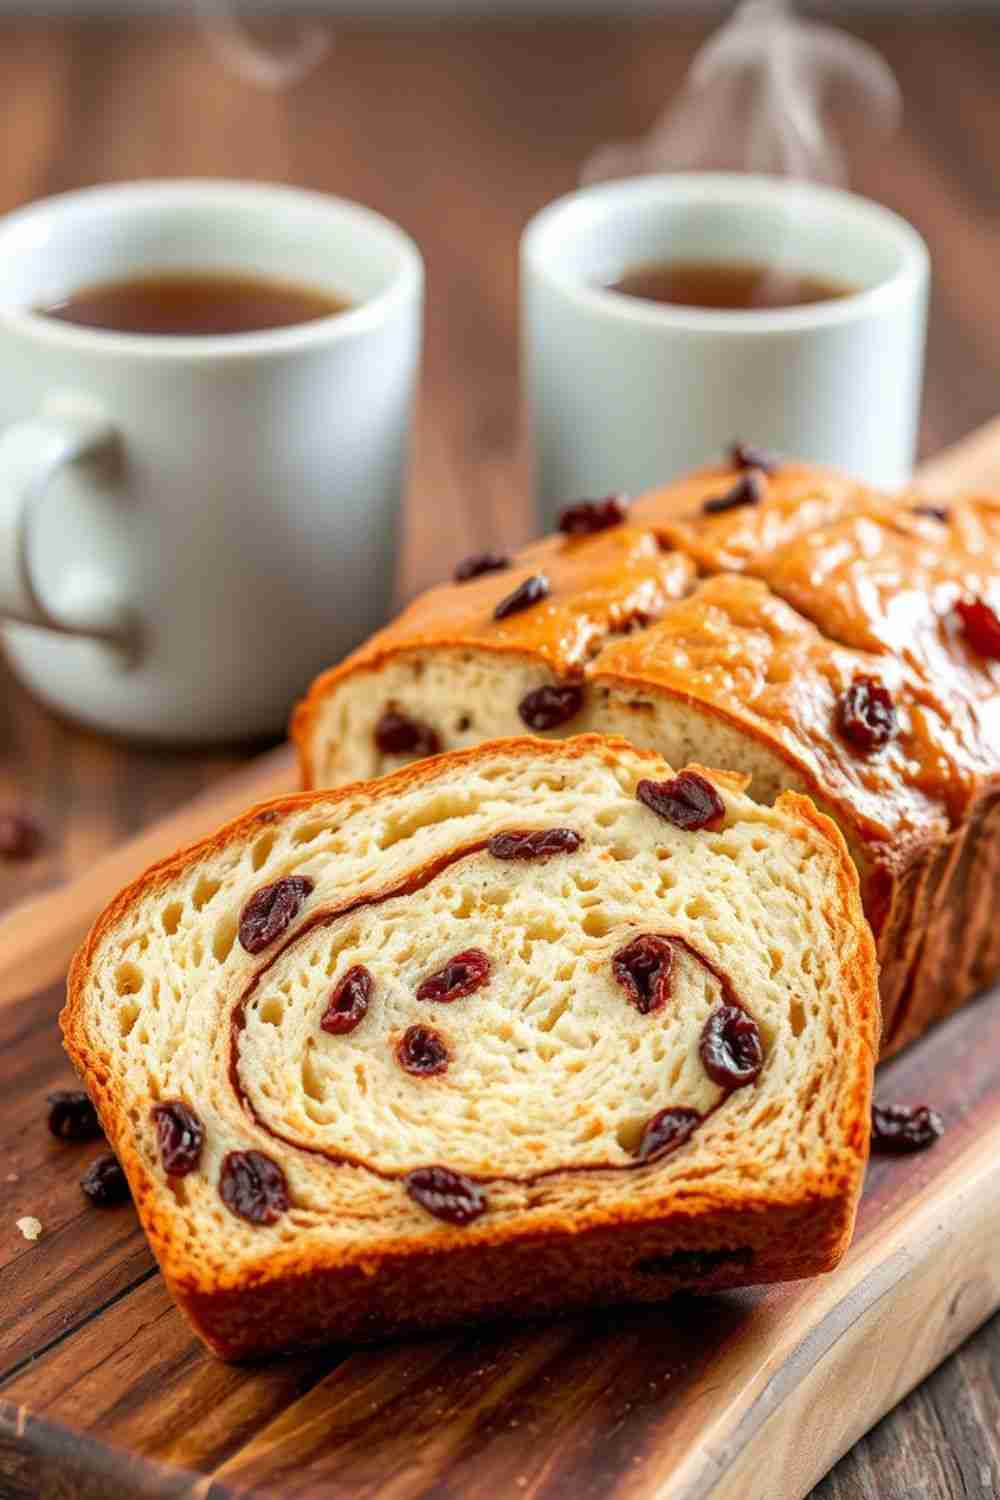
This loaf is my pride and joy. It’s fluffy, sweet, and smells like a cozy fall morning. The raisins plump up just right, and the cinnamon weaves through every bite. Trust me—no one will suspect it’s gluten-free.
Ingredients:
How to Make It:
- Wake Up the Yeast: Grab a small bowl. Mix the warm almond milk with a pinch of sugar, then sprinkle the yeast on top. Let it sit 5-10 minutes until it’s foamy. If it doesn’t foam, your yeast might be old—toss it and try again.
- Mix the Dry Stuff: In a big bowl, whisk the gluten-free flour, oat flour, brown sugar, cinnamon, and salt. Get it nice and even.
- Blend the Wet Stuff: In another bowl, beat the eggs, melted coconut oil, and apple cider vinegar. Add the foamy yeast mix and stir it up.
- Make the Dough: Pour the wet into the dry, stirring as you go. It’ll be sticky—don’t panic, that’s how it’s supposed to be. Toss in the soaked raisins and mix them through.
- Let It Rise: Scrape the dough into a greased bowl. Cover it with a damp towel and set it somewhere warm for 1 hour. It should puff up a bit.
- Shape It: Punch it down gently, then move it to a greased loaf pan. Smooth the top with wet fingers—it’s less messy that way.
- Rise Again: Cover it with the towel and give it another 30-45 minutes to puff up more.
- Bake It: Heat your oven to 350°F (175°C). Pop the loaf in for 35-40 minutes. It’s done when the top’s golden and a toothpick comes out clean.
- Cool It: Let it sit in the pan for 10 minutes, then move it to a rack. Resist slicing it hot—it needs time to set.
Pro Tip: Brush the top with a little melted coconut oil and dust with cinnamon for extra oomph.
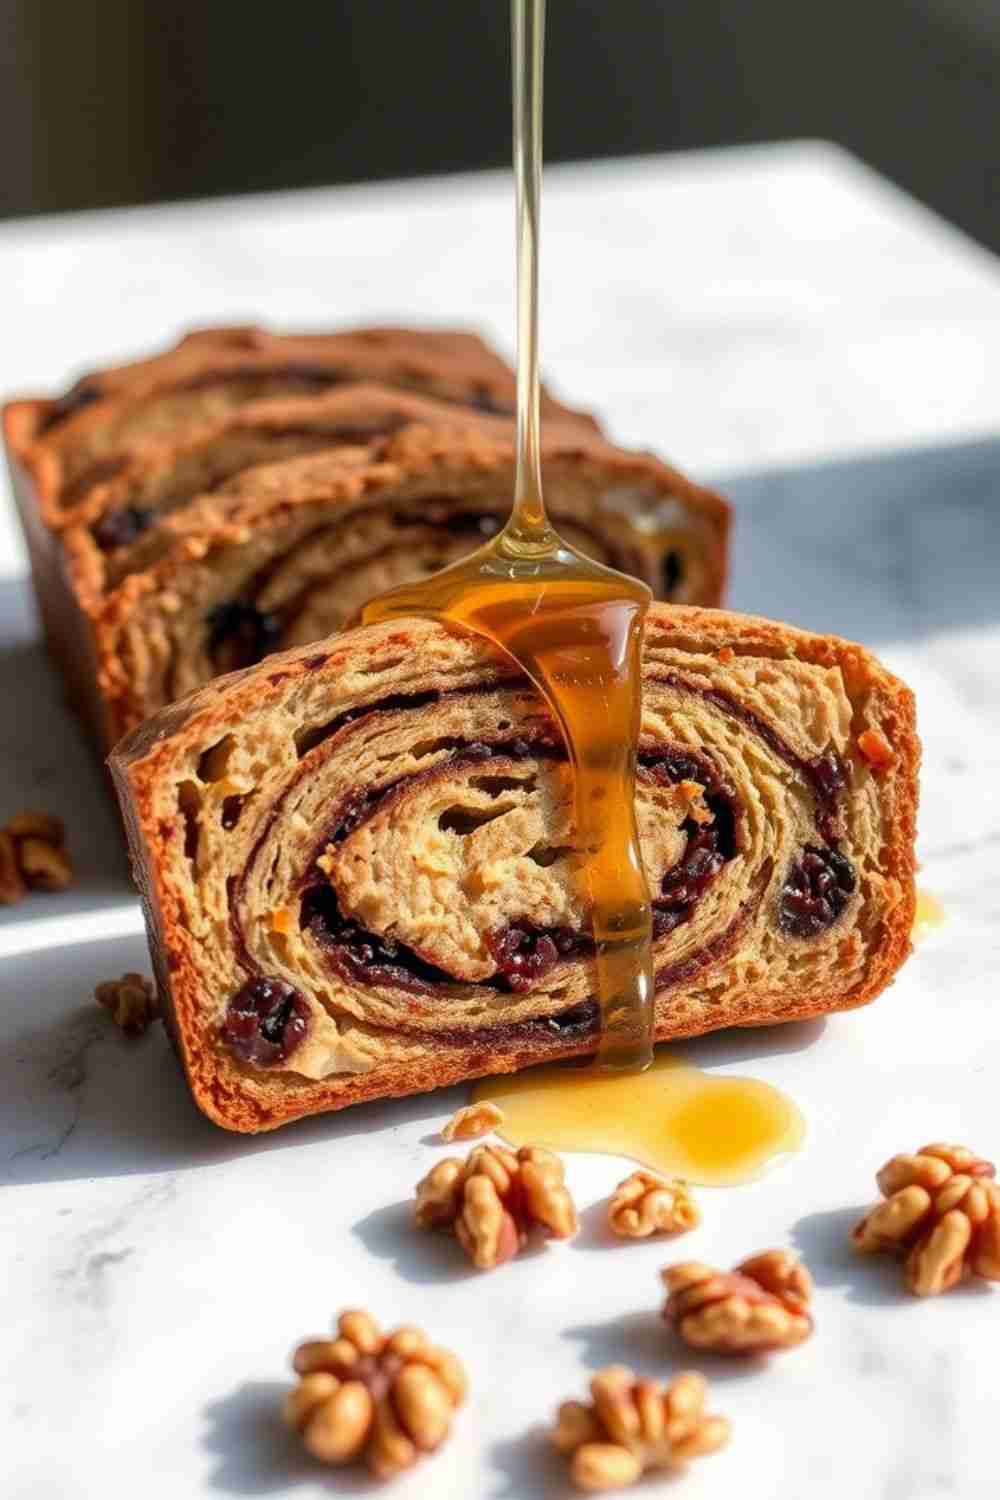
Recipe 2: Gluten Free Cinnamon Raisin Bread with Maple Walnut Swirl
This isn’t your average loaf. I dreamed it up when I wanted something fancier for a holiday brunch. The maple walnut swirl adds a sticky, nutty surprise that pairs perfectly with the raisins. It’s a showstopper.
Ingredients:
Maple Walnut Swirl:
How to Make It:
- Start the Yeast: In a small bowl, mix warm almond milk with a pinch of sugar. Add the yeast, let it sit 5-10 minutes until foamy.
- Dry Ingredients: In a large bowl, whisk the gluten-free flour, oat flour, brown sugar, cinnamon, and salt.
- Wet Ingredients: In another bowl, mix the eggs, coconut oil, and apple cider vinegar. Stir in the yeast mixture.
- Dough Time: Combine wet and dry, stirring until sticky. Add the raisins and mix well.
- First Rise: Move the dough to a greased bowl, cover with a damp towel, and let it rise for 1 hour in a warm spot.
- Make the Swirl: While it rises, mix the maple syrup, walnuts, cinnamon, and flour in a small bowl. It’ll be thick and sticky.
- Shape It: After rising, punch down the dough. On a lightly floured surface (use gluten-free flour), roll it into a rectangle about 1/2 inch thick. Spread the maple walnut mix over it, leaving a small border.
- Roll It Up: Starting from the long side, roll the dough into a log. Pinch the seam to seal it. Place it seam-side down in a greased loaf pan.
- Second Rise: Cover and let it rise 30-45 minutes.
- Bake It: Preheat to 350°F (175°C). Bake for 40-45 minutes until golden. Check with a toothpick.
- Cool It: Cool in the pan for 10 minutes, then transfer to a rack.
Pro Tip: Let it cool fully before slicing—the swirl needs time to firm up.
FAQs
Can I swap the oat flour?
Oat flour keeps it light, but you could try almond flour for a nuttier vibe. Just don’t use a heavy single flour like rice—it’ll weigh things down.
How do I keep it fresh?
Wrap it tight in plastic or a container for 3 days at room temp. For longer, slice and freeze it. Warm it up before eating—it’s worth it.
What if my dough’s too wet?
Gluten-free dough is stickier than regular. If it’s soupy, add a tablespoon of flour at a time, but don’t overdo it—you want it soft.
Can I skip the raisins?
Sure, leave ‘em out or swap for dried cranberries. The maple walnut version’s still plenty flavorful without them.
Wrap-Up
There you go—the secret’s yours now. This gluten-free cinnamon raisin bread (and its swirly cousin) turned my skepticism into obsession. Bake it, share it, eat it straight from the oven if you can’t wait—I won’t judge. Snap a pic of your loaf and tag me online. Let’s show the world gluten-free can be downright delicious. Happy baking!
Leave a Reply