
Introduction
The Allure of Homemade Bread
Nothing compares to the smell of fresh, warm bread straight out of the oven. For many, the idea of making homemade bread sounds like an intricate and time-consuming task. However, with the invention of bread machines, this once-daunting endeavor has become something anyone can do, no matter their skill level in the kitchen. Bread machines have revolutionized the way we approach baking by simplifying each step—mixing, kneading, rising, and baking—into one automated process. But how exactly do these machines work, and what makes them such a fantastic tool for creating fresh bread at home?
In this article, we’ll dive into the mechanics behind bread machines, explore their key components, and provide a detailed guide on how they work, along with some troubleshooting tips, common FAQs, and expert recommendations.
Table of Contents
Understanding the Bread Machine
1. What Is a Bread Machine?
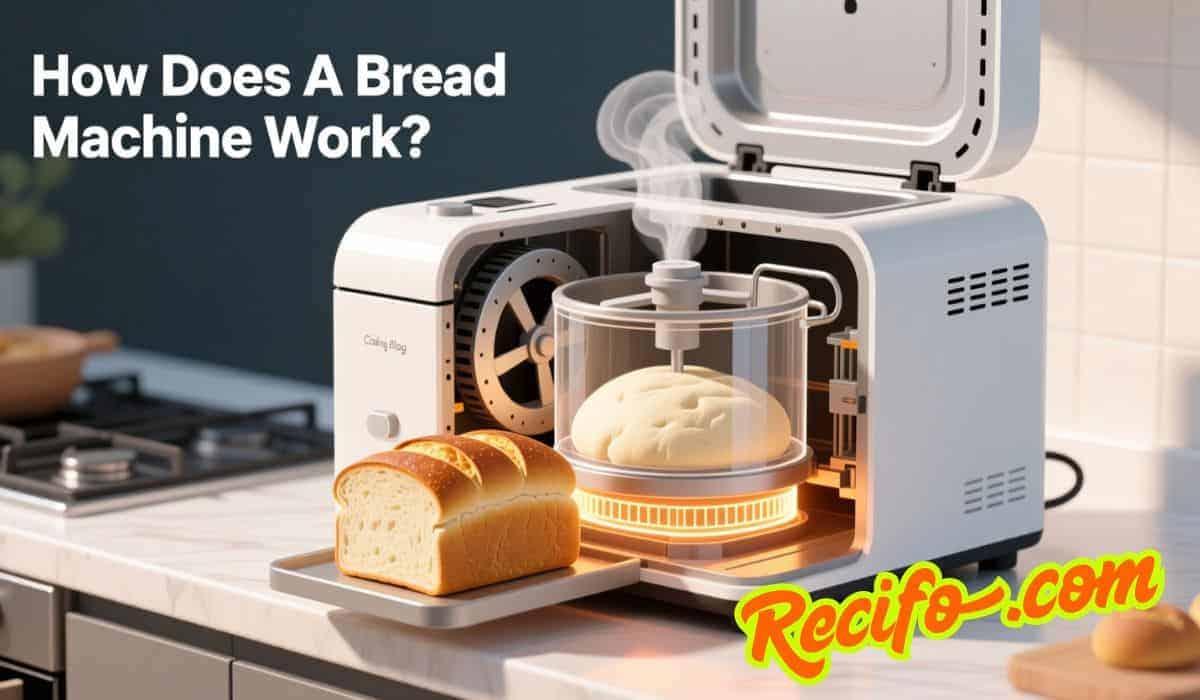
A bread machine is an electrical appliance designed to automate the process of making bread. It mixes, kneads, rises, and bakes the dough all in one unit. The concept is simple: add ingredients, choose the right settings, and let the machine do all the hard work. For people who love homemade bread but don’t have the time to knead dough or wait for it to rise, a bread machine can be a game-changer.
While bread machines can be used for various types of bread, they are particularly popular for basic white bread, whole wheat bread, and even gluten-free varieties. The bread machine simplifies the process by handling the repetitive tasks, allowing bakers to enjoy fresh bread with minimal effort.
2. Historical Context
The bread machine was first introduced in the 1980s in Japan, where it quickly gained popularity. By the early 1990s, they made their way to the United States, where they became a household staple. Initially, they were bulky, expensive, and somewhat limited in features. However, over the years, bread machines have evolved with modern technology, becoming more affordable, compact, and versatile. Today, you can find bread machines with a variety of settings for different types of bread, jam-making, and even cake baking.
Key Components and Their Roles
1. Bread Pan
The bread pan is the most important part of the bread machine. It holds the ingredients while the machine goes through its various stages—mixing, kneading, rising, and baking. The pan is typically made of non-stick material for easy cleanup. The size of the bread pan can vary, but most standard bread machines use a loaf pan size that produces a 1- or 2-pound loaf.
2. Kneading Paddle
At the bottom of the bread pan, you’ll find the kneading paddle, also known as the kneading blade. This paddle is responsible for mixing and kneading the dough. As the dough is stirred, the kneading paddle helps develop the gluten, creating the desired texture in the bread. For most bread machines, the paddle is removable, which makes it easier to clean after use. In some cases, the kneading paddle may remain inside the loaf, which results in a small hole at the bottom of the bread.
3. Heating Element
The heating element is located at the bottom of the bread machine and is responsible for providing the heat necessary to bake the bread. It works in tandem with the bread pan, ensuring that the dough bakes evenly. The heating element is controlled by the machine’s built-in sensors to maintain the correct temperature during each baking phase.
4. Control Panel
The control panel allows you to interact with the bread machine and select your desired settings. Most bread machines feature an array of buttons or a digital display where you can choose programs for different types of bread (e.g., white, whole wheat, gluten-free). The control panel also allows you to adjust settings like loaf size, crust color, and baking time.
5. Sensors and Timers
Modern bread machines come equipped with sensors and timers to ensure optimal baking. These sensors detect the temperature of the dough, ensuring that the yeast activates at the right time and that the bread rises properly. The timer allows you to set the machine to start baking at a later time, making it convenient to have fresh bread ready when you wake up or return home from work.
The Bread-Making Process in a Machine
1. Step-by-Step Breakdown
A bread machine simplifies the bread-making process into several easy-to-follow steps. Here’s how it works:
- Ingredient Preparation
Before starting the machine, you need to add your ingredients in the proper order. Typically, liquids go in first, followed by dry ingredients such as flour, sugar, and salt. Yeast should be placed last, on top of the dry ingredients, to keep it away from the liquids until the kneading phase begins. - Mixing
Once you close the lid and start the machine, the kneading paddle begins to mix the ingredients together. The paddle rotates at a slow speed to combine everything into a sticky dough. During this stage, the bread machine’s built-in sensors monitor the dough’s consistency, adding more water or flour if needed. - Kneading
The dough is kneaded for several minutes, during which the gluten in the flour is developed. Kneading is essential for creating the right texture in the final loaf. The machine ensures the dough is kneaded at the perfect speed and for the appropriate amount of time. - First Rise (Proofing)
After kneading, the dough is left to rise. The warmth from the heating element helps activate the yeast, which releases carbon dioxide and causes the dough to expand. This is the first rise, or proofing, phase of the bread-making process. - Punching Down
The machine will then punch down the dough, releasing large air bubbles. This step is important for achieving the right texture, as it helps distribute the yeast evenly throughout the dough. - Second Rise
The dough is allowed to rise again, although this second rise is often shorter than the first. This ensures that the dough is light and fluffy before baking. - Baking
Once the dough has risen adequately, the bread machine switches to baking mode. The heating element activates, and the dough is baked at a set temperature. The machine will usually bake the bread for about an hour or more, depending on the loaf size and program selected. - Cooling
After baking, the machine will alert you that the bread is ready. It’s important to allow the bread to cool for a few minutes before slicing to allow the structure to set and prevent the loaf from becoming mushy.
Exploring Advanced Features
1. Specialized Settings and Programs
Modern bread machines come with a wide range of settings that allow you to customize your bread-making experience. Some of the most common and useful settings include:
- Whole Wheat and Multigrain
These settings are designed to handle denser flours like whole wheat or multigrain. The machine will adjust the kneading time and rising period to ensure that the denser flour has enough time to develop properly. - Gluten-Free
Gluten-free bread is made with alternative flours like rice flour or almond flour. Bread machines with a gluten-free setting modify the kneading and rising process to work with the unique properties of gluten-free flours. - Dough Only
For people who prefer to shape and bake the dough separately, the “dough only” setting is perfect. This setting mixes and kneads the dough but stops short of baking it, leaving you with soft, ready-to-shape dough for other recipes. - Jam and Cake
Some bread machines also feature programs for making jam and cakes. These settings adjust the kneading process for different textures and help with temperature regulation to create the perfect consistency for non-bread items.
2. Customization Options
- Crust Color
Many bread machines allow you to select the crust color—light, medium, or dark. This setting changes the temperature and baking time to achieve the desired level of browning. - Loaf Size
Depending on your needs, you can adjust the loaf size. Most bread machines offer options for 1, 1.5, or 2-pound loaves. Some models even allow you to make smaller or larger loaves, depending on your preferences. - Delay Timer
The delay timer allows you to set the machine to start baking at a later time. This is great for those who want fresh bread in the morning or after a long day of work. You can add ingredients, set the timer, and wake up or come home to a freshly baked loaf.
The Science Behind Bread Machines
1. The Role of Yeast and Gluten
Yeast and gluten are the two key components that make bread rise and develop its signature texture. Here’s a closer look at both:
- Yeast Activation
Yeast is a microorganism that ferments sugars in the dough. As yeast feeds on the sugars, it releases carbon dioxide gas, which causes the dough to rise and expand. This process is critical for achieving light, fluffy bread. - Gluten Development
Gluten is a protein found in wheat flour. When kneaded, gluten forms long, elastic strands that trap air bubbles created by the yeast. This is what gives bread its chewy texture and structure. Proper kneading and rising are essential to developing the right amount of gluten.
2. Temperature and Time Control
Bread machines are designed to maintain precise temperature and timing during each stage of the process. The yeast needs warmth to activate, and the machine’s sensors ensure that the dough rises at the right temperature. The timing for kneading, rising, and baking is also carefully controlled to ensure the perfect loaf every time.
Maintenance and Troubleshooting
1. Cleaning and Care
A bread machine is a fairly low-maintenance appliance, but regular cleaning will help it perform optimally for years to come. Here are a few tips:
- Cleaning the Bread Pan: After each use, remove the bread pan and kneading paddle. Wash them with warm, soapy water and a non-abrasive cloth.
- Wiping the Exterior: Use a damp cloth to wipe down the exterior of the machine. Avoid using harsh chemicals or abrasive pads that could damage the surface.
- Cleaning the Heating Element: Ensure that the heating element is free of crumbs and debris, as this can affect the baking process.
2. Common Issues and Solutions
- Dough Not Rising
If your dough doesn’t rise, the yeast might be expired or the temperature too low. Ensure the ingredients are fresh and the machine is placed in a warm environment. - Uneven Baking
If your bread is baking unevenly, check that the bread pan is correctly placed in the machine, and ensure the machine’s heating element is functioning properly. - Noisy Operation
A bread machine may be noisy during the kneading process, but excessive noise could indicate a malfunction. If the noise persists after the kneading stage, it might be time to check the kneading paddle for damage or misalignment.
Writer’s Opinion
Having used a bread machine for years, I can confidently say it’s one of the best kitchen appliances for anyone who loves homemade bread but doesn’t have the time to bake it traditionally. The consistency and quality of the bread produced are excellent, and with features like the dough-only setting and timer, it’s perfect for people with busy schedules.
Frequently Asked Questions (FAQs)
Can I Use Regular Flour in a Bread Machine?
Yes, you can use regular all-purpose flour in a bread machine. However, if you’re making whole wheat or multigrain bread, you may need to adjust the flour-to-liquid ratio to account for the denser texture.
What Types of Bread Can I Make?
You can make a wide range of breads in a bread machine, including white bread, whole wheat bread, French bread, and even gluten-free loaves. Many machines also offer settings for making jams and cakes.
How Do I Prevent the Kneading Paddle from Getting Stuck?
To prevent the kneading paddle from getting stuck, make sure the bread pan is properly seated in the machine. Additionally, using a small amount of oil on the paddle before starting the process can make it easier to remove after baking.
Why Is My Bread Machine Making a Strange Noise?
If your bread machine is making an unusual noise, it could be due to misalignment of the kneading paddle or debris in the machine. Check the paddle and ensure it is properly seated in the pan. Clean the machine to remove any food particles that may be causing the noise.
Product Recommendations
- Panasonic SD-YD250 Bread Maker: Great for beginners, with easy-to-use settings and high-quality results.
- Zojirushi BB-PDC20 Bread Maker: Offers multiple programs and a reliable reputation for consistent results.
- Cuisinart CBK-210 Bread Maker: A budget-friendly option with essential features for everyday use.
Conclusion
Bread machines have come a long way in making homemade bread accessible to everyone. Whether you’re a seasoned baker or a beginner, the bread machine takes the guesswork and physical labor out of the bread-making process. From selecting ingredients to customizing settings for your perfect loaf, these machines truly make it easier than ever to enjoy fresh, warm bread at home. Happy baking!
Leave a Reply